Assignment
Overall Base
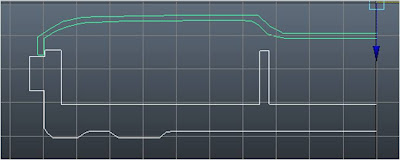
Firstly, I created the shell for the cover of my tray. I created the bottom outline using the CV Curve tool and vertex.
 Next, I created the shell for the bottom base of the tray. I have also created a hinge which I left out in my drawings, to secure the tray’s cover when it is placed above.
After completing the shells, I revolved it and the shape of the tray is formed. The hole in the centre is for the placement of handle used to lift the cover up. This is the bottom view of the tray.
 And the top....
Handle
Next, I started with the handle. Both the handle and the handle joint were fairly easy to make. Both of them are made by creating a cylinder and using the vertex tool to narrow one side of it.


Before combining the handle and the handle joint, I have removed the faces at the bottom of the handle piece and have also removed the faces at the top AND bottom of the handle joint, which will be connected to the top of the tray cover.


After creating the handle, I combined the handle, handle joint and the top of the tray using the Outliner.

'Wall' and Separators
By selecting the side of the tray, I then extruded the sides of the base tray to form the wall which will direct the rat race to another direction.

For the separators of the tray, I created a rectangle which is the general shape of the separators. Next, I use the Insert Edge Loop Tool to insert a edge on the separator, since it is not actually straight. Lastly, I moved the edge I created upwards, making a bump on the separator.


I have deleted the bottom and side faces before connecting the separators with the base of the tray.

Texturing
After completing the model, I textured both the tray base and the cover. First, I textured the base of the tray red, along with the handle of the tray.

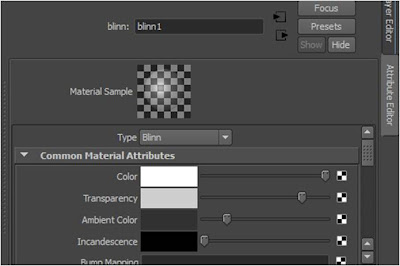
Next, I created a blinn texture which is white and colour and increase the transparency of the texture. This gives the texture a translucent look when applied on a object. I then applied this texture on the tray cover and the “wall” on the side of the base.

Cleaning up my model
When I first revolved my model, the entire model was “dirty”. Their were too many unused line on the model and they have to be cleared.


After tediously “cleaning up” my tray, the outcome is a clearer gridded tray which makes viewing much easier.


Pattern
Next, for the pattern that is on the tray, I used the EV Curve tool and formed the pattern. I then created a cylinder and extruded one face of it following the pattern, turning my pattern into a polygon. I set the number of divisions to 100 for the pattern to be smoother.
 Cylinder created at one tip of the pattern......
 And extruded following the pattern.

After creating one part of the pattern, I duplicated it five times and arranged it according to the surface of the tray cover. I then connected all the ends of the pattern to each other using the vertex tool and combined all the patterns together, creating one completed pattern.


Placement and Final touch ups
Lastly, I placed the pattern in place and applied the same texture the tray has to the pattern, giving it the same transparency.

After completing the entire top cover of the tray, I used the Outliner and combined the pattern and to tray cover together.

Edit: I have decided the change the texture of the “wall” to the same texture used for the tray.

After completing my model, I hid all the CV Curves I made by selecting all of them and using the Display -> Hide -> Hide Selection option.


And Tah Dah~!~!~!~! My tray model!

No comments:
Post a Comment