Sunday, August 21, 2011

SELF-CRITIQUE!!

I find my animation to be quite well refined besides some improvements which could be done. My animation in overall is not a fast-paced animation. Toby is reluctant in doing his job and this affects his movement heavily.

One major improvement that could be done is the movement of the head WITH the box to give more emotion in the animation. I have tried for literally hours, even with help from my friends who managed to do it and yet still failed. I have tried parenting it, using both orient and parent constraints and changing the pivot point of the box, but to no avail. That is the part of the animation which I felt can be improved on.

The most difficult part in my animation is the last part where the crane becomes dizzy after spinning. Since I could not move the crane head with the box, I have to coordinate my arm control and swivel base to make the dizzy movement. A LOT of time was spent on the graph editor smoothening the movement and that part alone was a killer. But I still made it =)

Now for some animation principles….

Squash and stretch

I did not use squash and stretch as everything in the animation is solid. The crane is metallic and I COULD give the box a squash and stretch, but I want it to have a “heavy” feel.

Anticipation

Anticipation can be seen in my animation when the crane prepares to hit the boxes. We can see that Toby builds up a momentum before hitting the box.

Follow through and overlapping action

This principle is important when it comes to giving something a personality. I have applied this principle when the crane smashes through the boxes and becomes dizzy. I do not want my animation to have an overwhelming ‘mechanical’ feel.

Timing

I find timing to be the most important principle to make animations human-like. A character that is frantic will have their keyframes closer than a character with a sad “aura” around it. Timing can be done more precised with the help of the Graph editor. I have used the Graph editor extensively for many principles besides timing.

Friday, August 5, 2011

Storyboarding

Character Description:
Toby is new to this line of work. He is usually at the back moving infinite bulks of metal scraps about. Life was simple and easy over there but he was then abruptly transfered to another department. Stacking boxs is what he does now. It might seem simple but one minor hiccup can cause his boss to loss hundreds of thousands of dollars. The pressure is piling up and Toby begans to work carelessly........

Toby Thoughts..
Before transfer:
"You know what? I can NEVER get bored of this job! I mean it is so simple to just fling metal scraps around and PLUS.... I get to have free weekly oiling! Nothing can be better than this!

After transfer: "WHY?!?!?! WHY ME!?!?!?! DAMMIT JOHN STOP VOLUNTEERING ME FOR STUPID CRAP! And this time it's PERMERNANT! Arggghh..... This job is stupid man.... having to do everything so precised. FML man I'm soooo gonna get dismantled and inspected on if i screw this up. Zzzzz.....

StoryBoard
1) Toby picks up the box

2) Toby stacks the box on top of the other boxes

3) He goes back up and realized that the box is stuck!

4) He desperately tries to drop the box but to no avail.

5) Toby then tries to use the boxes on the floor for leverage.

6) Unfortunately, his excessive strength blew all the other boxes away!!

7) He then goes spinning and spinning uncontrollablely!~!~!~!

8) Dizzy Toby eventually comes to a stop and then the box drops lightly


Friday, July 22, 2011

Week 13: Mech Arm

ARRRGGHHH!!!! Apparently the school computer had a virus in it that transferred into my thumb drive and when I went home, my anti-virus detected the virus and deleted all the file that contained the virus. Which was practically EVERYTHING.

Luckily, I had backups stored on my laptop for all my files....HOWEVER... the screenshot of the process of making the animation were lost zzz.

Anyway, this week lab was the animation of the crane. The final outcome was to pick up the box and move it to the platform. I found this lesson to be a huge step forward as we learnt how to use skeletons and constraints. These skills are the stepping stones to creating a realistic or at least a human animation model.


There were a few problems when I was doing this exercise. I did not know how to use the Constrain -> Set to Rest Position function and my box teleported around when i used the constraints. Another problem i encountered was that I thought that we had to parent the cargo box to the arm control for it to move but apparently a constraint was needed. It took me awhile to complete this exercise and i had to ask around for some help regarding the problems. Eventually though, I completed it and I have a good feeling of the assignment ^_^

Wednesday, July 20, 2011

1) Do you need to be able to draw well to create good 2D animation? Explain your view.

Yes, I do believe that we need to be able to draw well to create a good 2D animation. I find that we need to be able to draw the frames to be as smooth as possible compared to the previous frames


2) Do you need to be able to draw well to create good 3D animation? Explain your view.


On the other hand, I do not thing that drawing affects 3D animation THAT much. You still need to know how objects and living thing move and react to other objects and that affects how you animate 3D. However, you do not need to draw in 3D (or at least not now) and hence a lesser importance of it compared to 2D.


3) What do you think would separate a piece of poor animation from a piece of good animation? In other words, how would you go about deciding if a piece of animation is good or bad?


I would see the distance in each frames and how realistic they look like.


4) In 2D animation, you need to be very aware of timing at a frame by frame level, using timing charts and other techniques - but for 3D animation, this is handled using the graph editor, which is more concerned with manipulating rates of change over time.


Personally, I find the graph editor to be of better use as it is more "clear". Editing on the graph editor is much easier than frame by frame checking.

Does this affect how you approach your animation work? Explain.


It would make working on animation much easier and precise.


5) Give a brief critique of Maya as an animation tool. Don't just say Maya makes animation difficult, or easy, or that you need to learn a lot of stuff to use Maya - explain what Maya does well and not so well in terms of creating animation.


I do not know how to answer this question as I have not used any other 3D animation platform and cannot compare. I am personally fine with using Maya now ^^

Week 12: 3 Balls Bounce

This video shows my work for the three bouncing balls. The grey ball is a regular basketball, the orange ball is a ping pong ball and the shiny metal ball is a .......... shiny metal ball!

This animation was particularly hard and I don't know why! I think it was probably the weight and the timing of each ball that makes it difficult. I guess this was a good workout exercise =p

Friday, July 8, 2011

Week 11: Squash and Stretch


First i created the ball and the squash handle. Then i dragged both of them under the translate_ball_gp.


I then locked all the other values which will not be used for safety pre-cautions. These is done to all objects in the group.


The Factor of the squash_handle affects how the ball is squashed or stretched. A positive value stretches the ball while a negative value squashes it.


Set the Frame Per Second to Real-time[25fps] .....


Adjust how to ball hits the ground and bounces up at the Graph editor and after other changes....


VOILA!!!

Another great exercise to improve our animation skills. This exercise is an essential part in animation as it teaches us how to create one of the most important principle of animation. Of course this alone it not alot compared to the industry but still... alot learnt from this exercise ^^

Week 11: Animation 3D


How to use maya to animate was taught in class. Keyframes have to be placed and Maya does the moving. Before starting, it is necessary to change the Frames Per Second (FPS) to Real-Time(25fps) or the animation will play at 100fps by default. The graph editor was also taught in class but not into much depth until the next exercise. This is the first step for all students doing 3D animation! WOOOOOOOOOOOOOOOoooooooooooo!!!!!!!!!!!!!
Thursday, July 7, 2011

Week 10: 2D animation (Pencil)


Both of these videos shows the lesson on basic keyframes in an animation. They are not refined that much to show the placing of each keyframe (And also i lost my refined ones in class :'( ). Both animations have forces moving them. The ball is bounced by gravity and the seaweed is moved by waves. This exercise shows us how to do an animation with foreign factors working on it. Another MUST LEARN in Animation ^^.

Week10: Animation Visualisation


  • Squash and stretch: Squash and stretch can be seen when their bodies straighten up when jumping.
Anticipation: Anticipation is seen when they squat down.
Staging: No clear if there is a staging in the video.

Straight ahead and pose to pose: This is a live-action video and not a animation and hence I do not think this principle can be implemented.

  • Follow through and overlapping action: Follow through and overlapping action of the hoodie string worn by one of them.

  • Slow in and slow out + Timing: When launching themselves into the air, the Slow in and Slow out and Timing principles are executed, showing the weight and acceleration of their movements.

  • Arcs: No arc is displayed.

  • Secondary Action: While in the jump, the Secondary Action of their facial expressions can be seen

  • Exaggeration: None displayed:

  • Solid drawing: Not sure this applys to real-life videos but I would say not.

  • Appeal: The two of them! haha

  • Anticipation- In the video, the character seems to be looking for something until the camera shows the helmet. This shows anticipation of picking up the helmet.

  • Follow through and overlapping action - When the character tries to get up and places his hand on the ground for support, his head nods downwards which gives the feel of him trying to hold himself up.
  • Exaggeration - Explosion of AWESOME proportions

Appeal - Nice graphics for the bubble shield for appeal

Slow in and slow out - Starting from a stand still, he starts running and accelerates quickly.
  • If you watch the entire video, other principles of animation like Secondary actions and Solid drawing are made very prominent throughout the video. This exercise is a very important exercise for all students learning animation and they are the fundamentals for making animation. I hope to learn more about it throughout the course and hopefully produce an EPIC animation!! =)))

Sunday, June 12, 2011

My Big Update!

P.S. Before I proceed with my assignment, I will like to say that I have updated my blog in one big update. The update consists of my entire assignment, the chrome shader exercise and the dice exercise. Thank you.

Self Critque

Now that my assignment is done, I felt that i should have chosen a different object. The reason being that i found mine to be a little simple compared to what my other coursemates have chosen. However, I DO admit that the pattern on the top of the tray was the toughest part for me. Adjusting each individual pattern to make them connect was tedious. But in general, i felt that i could have done something else better then i did with my tray model. That is what i feel though.... hehe

Ok now my critque about the model itself. There were parts of the model which i cannot quite figure out how or what to do about it. Other then the frequent Difference/Union failure where both selected objects disappears, is it possible to change the size of a face so that i can delete it when i cannot use difference? And since i could not use Union too, I had to combine the pattern to the tray cover instead. I have also heard that using Difference in Maya is not a good practice and i hope to learn more about it in the future.

While modelling my model, i have also been taught to "clean up" my model. Other than reducing the number of edges on the model dramatically and being a ease for my eye, I do not know what other benefits "cleaning up" gives. Perhaps it prevents messes and accidents when one is professionally modelling? Got to dig deeper into this...

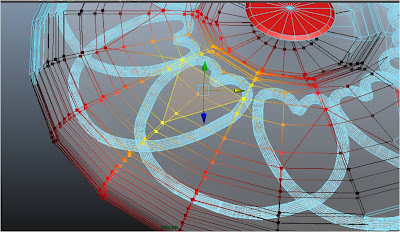
And lastly, the pattern on my tray cover. Before i started working on the pattern, i thought that i could do one part of the pattern and revolve it five to six times around a pivot point. However, after trying to do that, i found that it was not possible to get that done (or is it?). Hence i had to manually duplicate the pattern five times and edit each pattern's joint so that it could connect with one another. I hope that i will learn an easier way to do this in the future.

Oh .... i have found an error in the final pattern i made and i tried to correct it but apparently Maya is preventing me to do so. Until now, I still cannot use the Edge, Vertex or Face function in my Maya as whenever I click on an edge, vertex or face, it turns to this...

It looks like Soft Modification and I don't know if it is, but I hope to learn how to revert it back to it's original function.

Still, I am quite pleased with my final outcome and I hope you are too! Thank you!!

Assignment (Tray)

Assignment

Overall Base

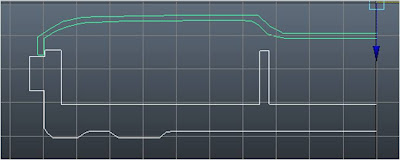
Firstly, I created the shell for the cover of my tray. I created the bottom outline using the CV Curve tool and vertex.

Next, I created the shell for the bottom base of the tray. I have also created a hinge which I left out in my drawings, to secure the tray’s cover when it is placed above.


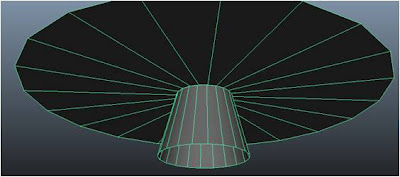
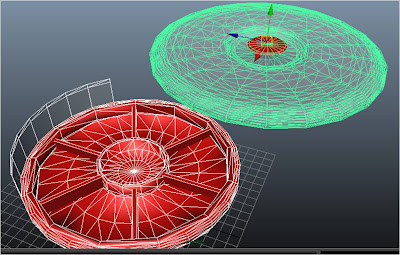
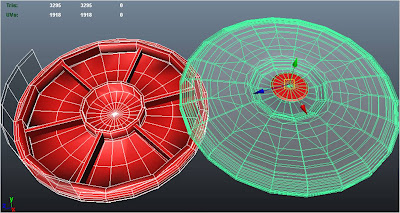
After completing the shells, I revolved it and the shape of the tray is formed. The hole in the centre is for the placement of handle used to lift the cover up. This is the bottom view of the tray.

And the top....


Handle

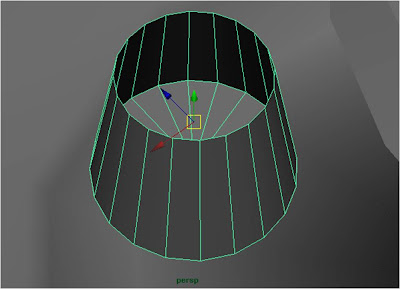
Next, I started with the handle. Both the handle and the handle joint were fairly easy to make. Both of them are made by creating a cylinder and using the vertex tool to narrow one side of it.


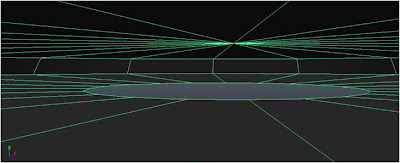
Before combining the handle and the handle joint, I have removed the faces at the bottom of the handle piece and have also removed the faces at the top AND bottom of the handle joint, which will be connected to the top of the tray cover.


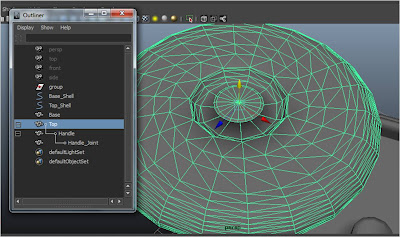
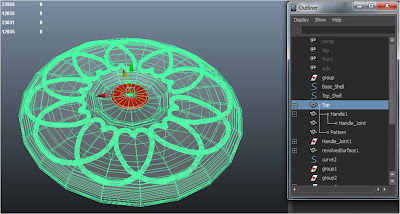
After creating the handle, I combined the handle, handle joint and the top of the tray using the Outliner.


'Wall' and Separators


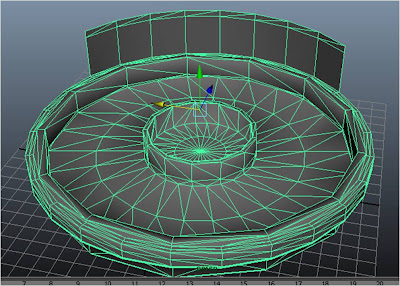
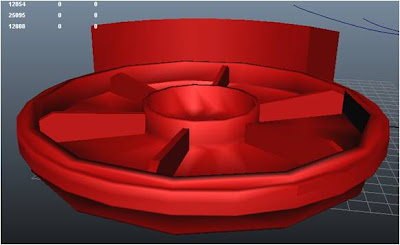
By selecting the side of the tray, I then extruded the sides of the base tray to form the wall which will direct the rat race to another direction.


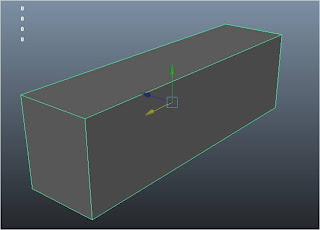
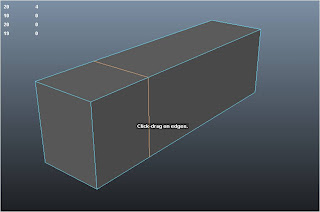
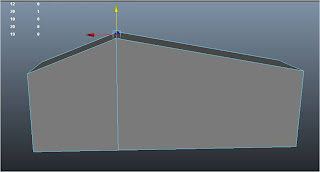
For the separators of the tray, I created a rectangle which is the general shape of the separators. Next, I use the Insert Edge Loop Tool to insert a edge on the separator, since it is not actually straight. Lastly, I moved the edge I created upwards, making a bump on the separator.


I have deleted the bottom and side faces before connecting the separators with the base of the tray.


Texturing

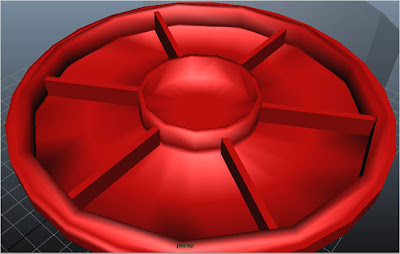
After completing the model, I textured both the tray base and the cover. First, I textured the base of the tray red, along with the handle of the tray.


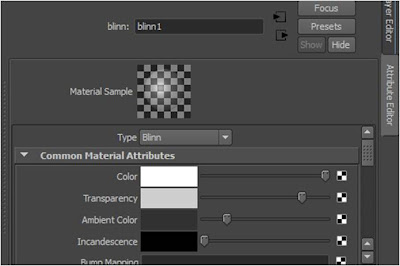
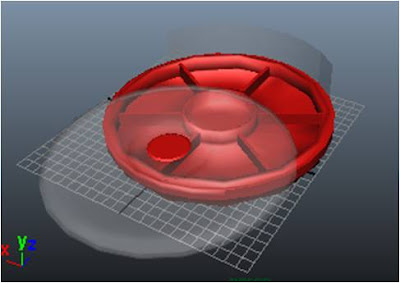
Next, I created a blinn texture which is white and colour and increase the transparency of the texture. This gives the texture a translucent look when applied on a object. I then applied this texture on the tray cover and the “wall” on the side of the base.


Cleaning up my model

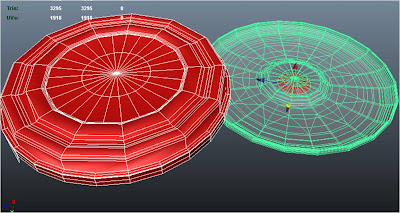
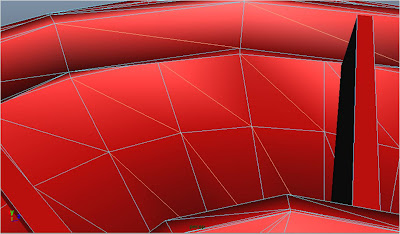
When I first revolved my model, the entire model was “dirty”. Their were too many unused line on the model and they have to be cleared.


After tediously “cleaning up” my tray, the outcome is a clearer gridded tray which makes viewing much easier.


Pattern

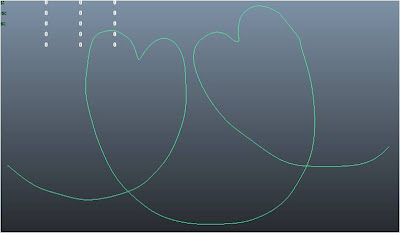
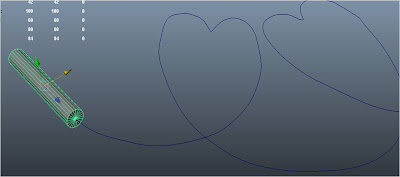
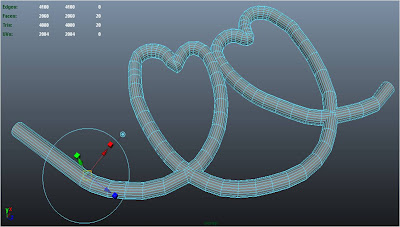
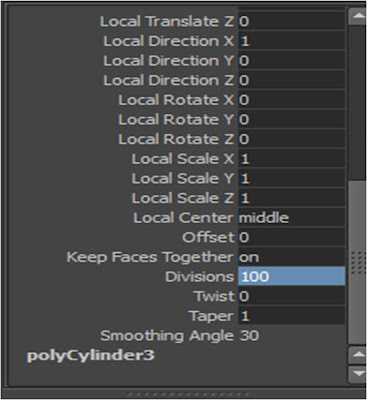
Next, for the pattern that is on the tray, I used the EV Curve tool and formed the pattern. I then created a cylinder and extruded one face of it following the pattern, turning my pattern into a polygon. I set the number of divisions to 100 for the pattern to be smoother.

Cylinder created at one tip of the pattern......

And extruded following the pattern.


After creating one part of the pattern, I duplicated it five times and arranged it according to the surface of the tray cover. I then connected all the ends of the pattern to each other using the vertex tool and combined all the patterns together, creating one completed pattern.


Placement and Final touch ups

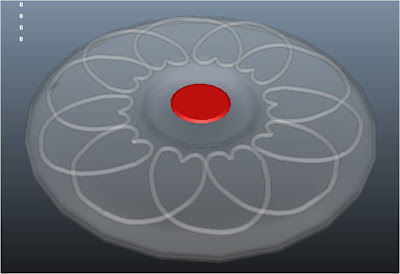
Lastly, I placed the pattern in place and applied the same texture the tray has to the pattern, giving it the same transparency.


After completing the entire top cover of the tray, I used the Outliner and combined the pattern and to tray cover together.


Edit: I have decided the change the texture of the “wall” to the same texture used for the tray.


After completing my model, I hid all the CV Curves I made by selecting all of them and using the Display -> Hide -> Hide Selection option.


Final Output

And Tah Dah~!~!~!~! My tray model!