Saturday, May 7, 2011

Week 2-Lab 2- Part 3

CardBoard Box

This is the cardboard box I did (before making it look old):


And this is after I added effect....
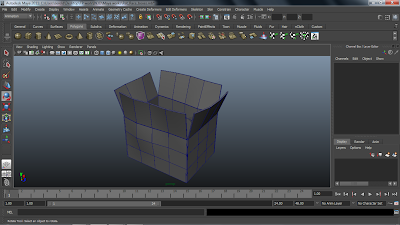


I have only achieved completing the boxes after two attempts, where my first attempt fail when not understanding the instructions posted online.

I have learnt how to use the wave function in which it gives an object it's crumpled look. I have also realized that the "strength" of the wave is determined by it's size and learning not to over-do it is also a good practice.

Reference
This cardboard box requires me using the "Extrude" tool and here is a link for a tutorial for extruding in Maya.

Here is also a link for a video of non-linear deformers, which made my cardboard box look older.

Thursday, May 5, 2011

Week 2 Exercise 2

Block Toy Train

Front View:


Back View:
It took awhile but I have finally completed the toy train. I have bevel-ed the entire train and managed to create the windows of the front carriage. I'm PrOgReSsInG!!!

Week 2 Exercise 1

My completed toy block


This is one of the toy blocks I modelled in class.

This exercise teaches us how to us the Boolean -> Difference function and it also teaches us how to change the shape of an object using it's vectices. These two functions taught seems to be very useful in the near future whenever I want to make more complex objects with holes in it.

Wednesday, May 4, 2011

Week 1 Exercise 3a

Angle 1:


Angle 2:
Above are two screenshots of Prinny. I do not really have anything to comment since I modelled Prinny after I modelled the IMP which was harder to do.

However, I have realized that modelling these two robots drills us in our fundamentals such as switching between the camera views (Perspective and 4 angles), changing of controls using shortcut keys (Example: E, R, T, ....) and the moving of the camera with the mouse + ALT key.

Week 1 Exercise 3b

My Robot "IMP"

Angle 1:


Angle 2:
This is my companion robot "IMP" which stands for IMPossible. It has two wings and is able to breath polygons out of it's mouth. Wherever I am, the IMP will make sure that I am safe from bird dropping by circling above me. The "IMP" is extremely reliable with it's unlimited battery life Kryptonite*. It makes sure that I am spending my time doing something useful by constantly dismantling itself and unpacking my bag for no reason.

The "IMP" is currently for sale at the discounted price of $313 @Somerset.


*Please purchase your Kryptonite from Krypton if still avaliable


Tuesday, May 3, 2011

Week 1 Exercise 2

Robot
This is a drawing of one of the robot image given for this exercise. In my drawing, I have shown some primitive shape by seperating them from the original picture.
The feet of the robot is a plate which is an flattened rectangle while the bullet-like feature at the robot's legs is made by connecting a cylinder and a semi-circle.
The last part of the robot I seperated is the arm, which is a curved cylinder. As an arrow is not drawn, that piece is on the top left-hand side of the drawing

Monday, May 2, 2011

Week 1 Exercise 1

Lander Ship


This drawing is a drawing of the Lander Ship image. The description of the parts are difficult to read and will be explained here.

At the bottom left hand corner of the image is a drawing of the Lander Ship without it's wings from it's front view. In this view, we can see that the body of the ship is an Octogon. The line cutting through the middle of the octogon is the sharp edge at the head of the ship.

The drawing at the bottom right hand corner of the picture is the ship's turbine drawn to show it's three different primitive shapes.

Gundam Gun


This is a drawing of the Gundam Gun image. I have seperated a few of it's components to show the primitive shape used to create that part of the gun.

First is a cylinder used as a nozzle to connect the tip of the gun with the barrel of the gun.

Then there is the half cone supposedly used for the laser pointer of the gun.

The main frame of the gun is an elongated hexagon with the top of it stretched upwards.

And finally the scope of the gun, with is made by combining a cylinder for the top, a 3/4 cone for it's base and a 1/4 bottom half of the cone for the tip.